

Creating a FreeGuides Experience on the Mobile App
Do you have secret adventures that you want to share to the rest of the world? Well today I'm going to teach you how to create a FreeGuides experience to share to the whole world.
To get started, download our app FreeGuides at http://onelink.to/freeguides. This will allow you to access all of the experiences other guides have created on our platform as well as gives you the ability to publish your very own experience.
Step 1
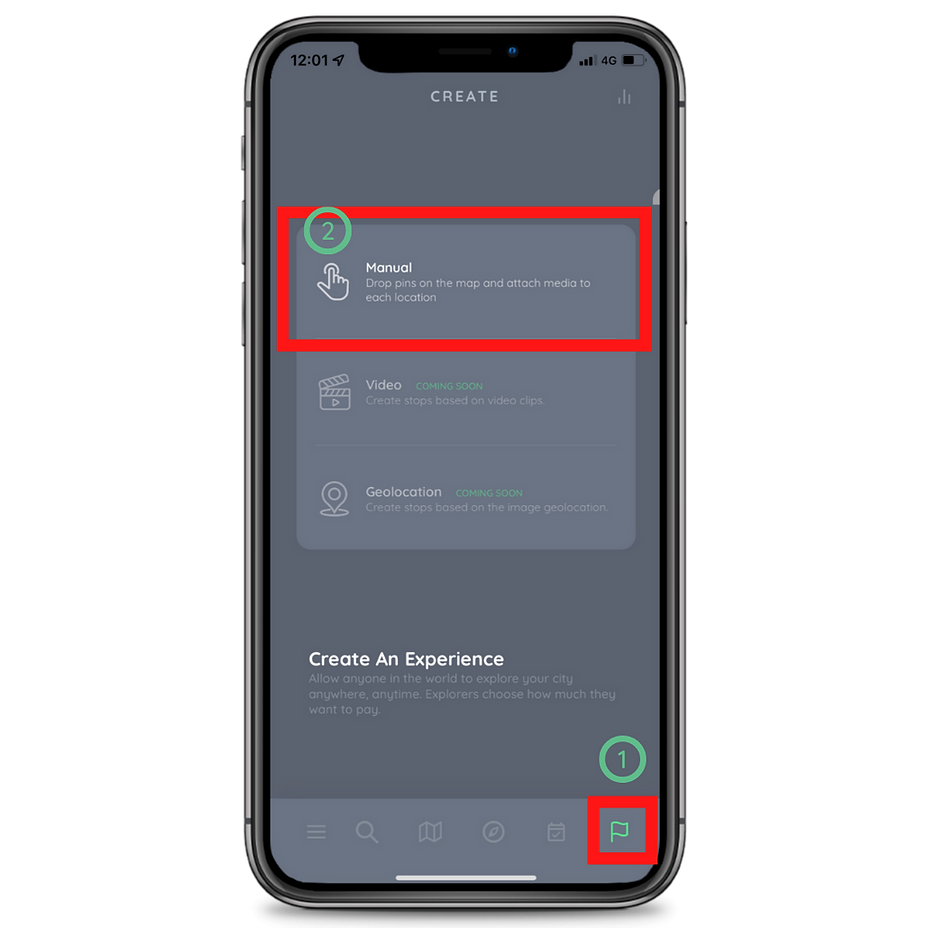
Upon opening the app you can see the tabs: Search, Around Me, Explore, Saved and Create.
To make an experience, press on the ‘Create’ ( 1 ) tab to start creating your guide. Then select 'Manual' ( 2 ).
Step 2
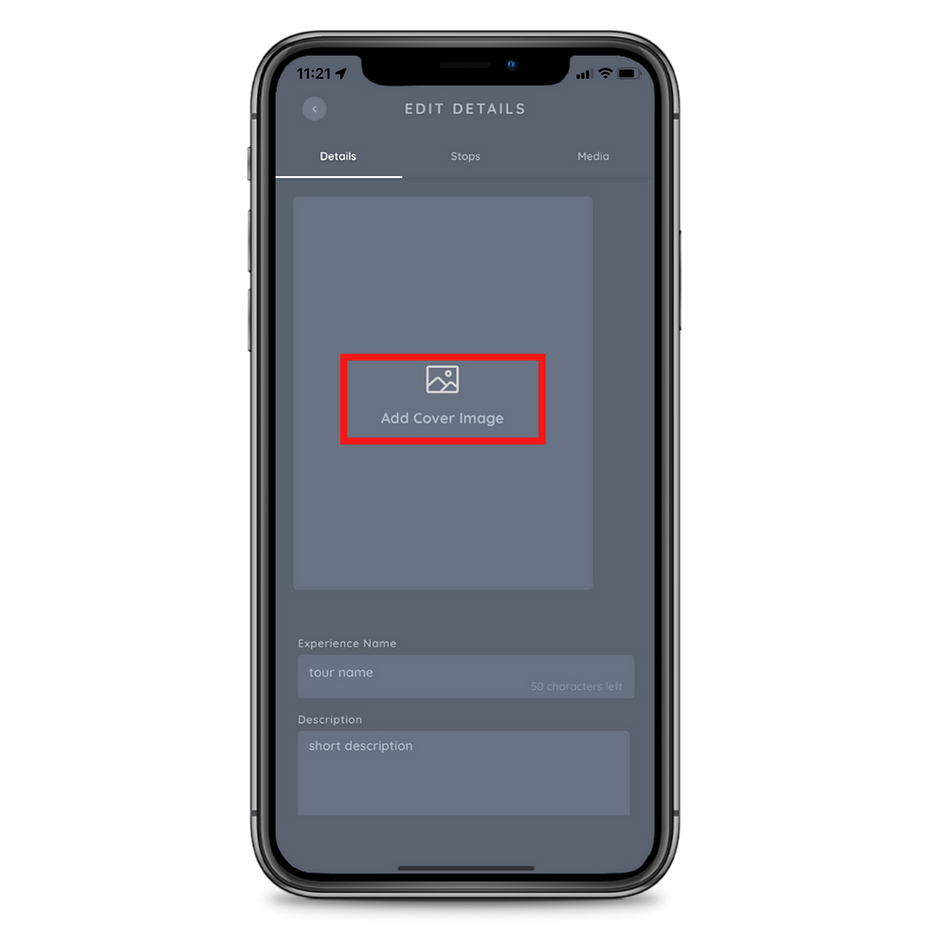
Choose a 'Cover image' which is suitable for the experience. You can add multiple to ensure that the user is visually well informed on the experience and what to expect visually. Click 'Add cover image' to insert an image.
Step 3
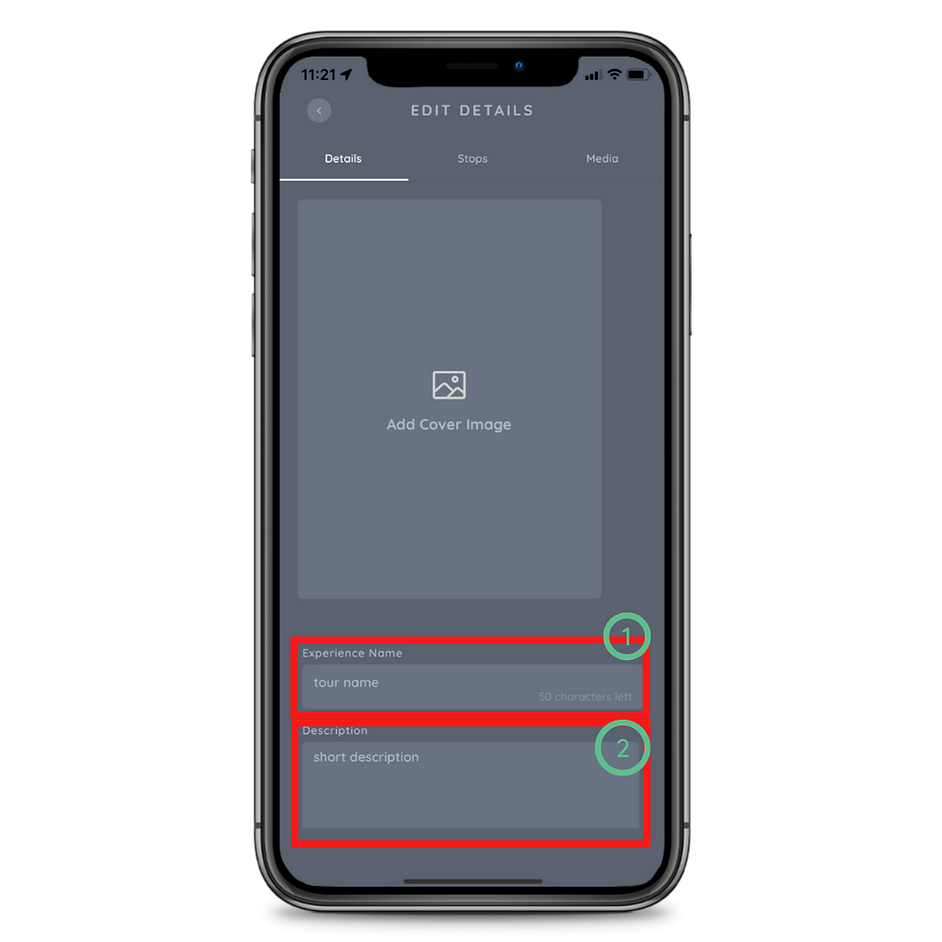
Give the 'Experience' ( 1 ) a name which will give the explorer an understanding of what the experience will be like. Having something catchy would benefit your experience as it may increase the likelihood of it being run.
Next, put in a brief 'Description' ( 2 ) on what the experience is about. This goes hand-in-hand with the experience name as it gives the explorer a better understanding of the contents of the experience.
Step 4
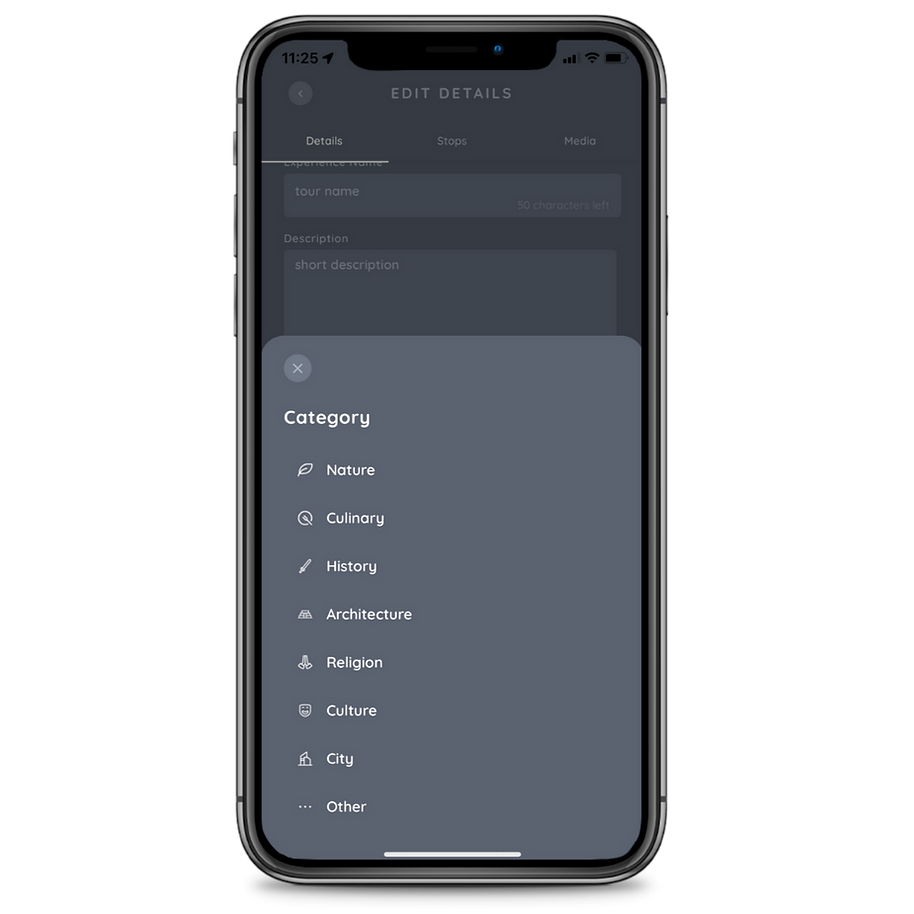
Pick a 'Category' from either a nature, culinary, history, architecture , religion, culture, city or other. This will assist explorers filter the guides to a specific category to more easily find their niche.
Step 5
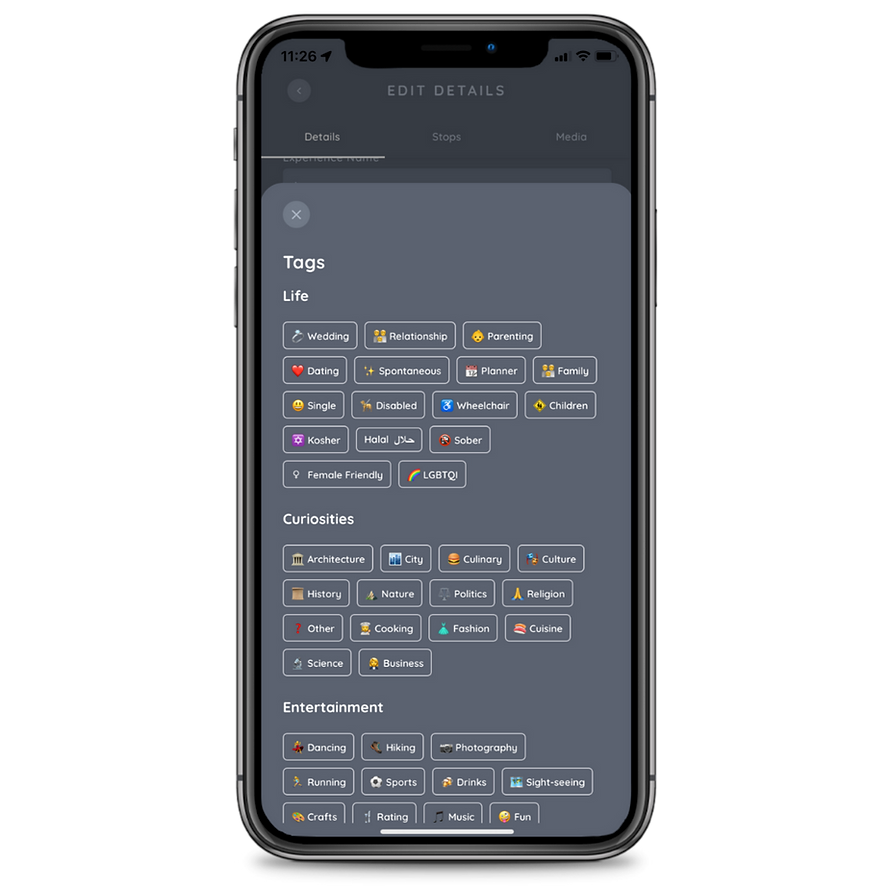
Now that you have chosen a category, you are able to add 'Tags' to the experience such as the ones in the image below. You must select at least 5 tags per experience. Having the relevant tags on each experience is crucial as it determines the contents of the experience. This allows the explorers to gain an understanding of the experience before conducting it.
Step 6
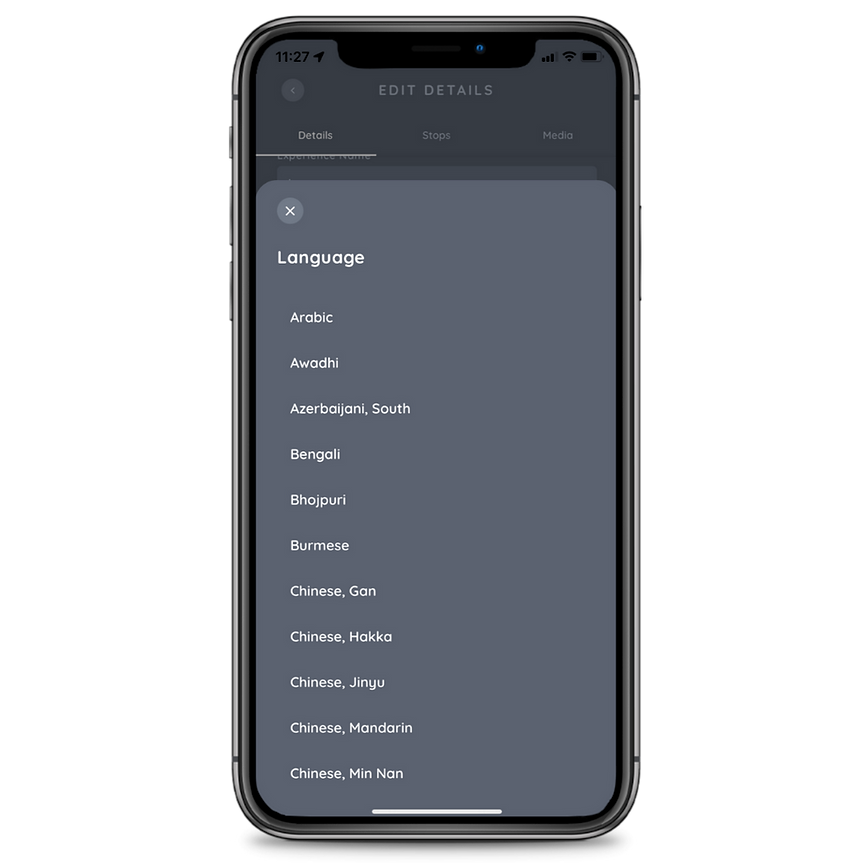
Select what 'Language' you have created your experience is in. The significance of this is that users from all over the world can use FreeGuides when they filter the guides for different languages.
Step 7
Type in your 'Tour Duration' ( 1 ) to the closest approximate hour. This will assist the users to find a guide that they have time in the day for it.
Press 'Next' ( 2 ).

Step 8
Next, you will be led to a map where you can choose the start destination.
a )
You can enter the starting location of your experience in the 'Search ' bar ( 1 ) and it will display a list of places that match your searches.
b )
Alternatively, you can drag and drop the X marker and 'Add Stop' ( 2 ) to manually add the stop.

Step 9
Once you have created a stop, you can add media to each given stop by selecting the 'Media' ( 1 ) tab and then 'Add Media' ( 2 )

Step 10
You will be given the option to include media through the following options; Images, Videos, Audio, Text and Links. These options will allow you to add content to the experience and to give the explorer an overall more enjoyable experience. And the better the experience, the more likely they will go on more of your experiences and hence more likely to tip you.

Images are an easy addition to the experience as they provide a visual representation of what the experience would look like. As they say, a picture means a thousand words. The beauty of the experience can only be explained through a visual representation. You can choose to take the photo live at the spot or you are able to choose a photo you have taken previously.
Videos are a very easy way to demonstrate an experience in the full tour. For example, you can upload a video of the views of the experience you are guiding which allows the explorer to understand. Furthermore it can be used to promo the experience by snapshotting the key moments of the experience; similar to a vlog intro.
Audio is also an important tool that you can implement into your experiences as it will allow you to verbally guide the explorer with the content. This audio can be played while they are partaking the experience and not have to read the content as they are walking. Having a good audio explanation will allow the explorers to take their eyes off the screen and listen to the audio.
Links can also be added for the explorers convenience to lead them to the official website of the experience or could be linked to a YouTube video where they can view similar content that is already existing.
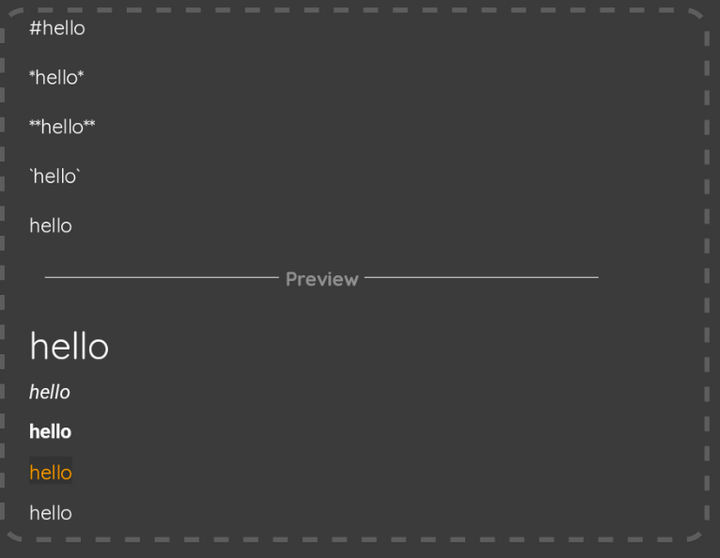
Text can also be added for the explorer to read and to give them an understanding / description of the given experience. The text is written in 'Markdown Language' and can be used to format the text.

Repeat this process until you have completed your experience by adding multiple stops and media to each stop. Once you have completed creating your steps, press 'Save'.
Step 11
Finally, select 'Publish' when you have completed creating your guide.

By following these steps you are able to create your very own experience for everyone else in the world to use. You can view other people's content in the explore page for inspiration to see how they do things.
Step 12
The 'Approval Process' begins once you publish the experience. It will be under 'review' and a FreeGuides member will either approve it or deny it within 24 hours.
You can choose to 'Preview' the experience in the eyes of an explorer to get a better perspective on how they experience the guide.
You can also change whether it is active or not in the 'Active' option to alter whether the experience is live.
You can also choose to 'Delete' the experience if you do not want the experience in the system anymore.

.png)
.png)


.svg)
.svg)
.svg)
.svg)